Written By Cusser – Slight edits by MazdaMitch
Lets replace the Mazda B2200 Power Steering Pump and Power Steering Idler/Tensioner Pulley Bearing.
Start by disconnecting the battery negative terminal, always a good safety idea. Same with wearing safety glasses.
Loosen the idler pulley collar bolt (22mm wrench), then tighten the power steering belt adjustment nut (12 mm socket and extension) to tighten the power steering belt a lot, to prevent the power steering pulley from turning.
Now you can loosen the power steering pulley nut using a 17 mm socket and bar. You may need to put the truck in gear, or put a 21 mm socket on the crankshaft pulley bolt and wedge a breaker bar with the ground to prevent the engine from turning, it will be tight.
Now loosen the idler pulley collar bolt with a 22mm wrench again and loosen the power steering adjustment bolt using a 12 mm socket and long extension, and remove the PS belt.
Use two long screwdrivers to gently pry off the power steering pulley and sprocket – it should come off readily without a special puller (don’t let the little woodruff key on the PS pump shaft fall out and get lost, remove the woodruff key if it comes out easily). If this becomes too difficult, just remove the 4 small bolts (10mm socket) holding the PS pulley to the sprocket and deal with that sprocket later.
Raise and support the front end on jack stands. Remove the four bolts holding the engine cover plate (12 mm socket).
Disconnect the PS return hose (hose clamps) from the bottom of the PS pump; have a drain pan ready to catch the old PS fluid.
Remove the nut holding the high-pressure side banjo fitting on the driver side of the PS pump (14 mm gear wrench or box wrench).
Remove the two bolts (12 mm gear wrench or box wrench) which clamp the high pressure banjo fitting line to the PS pump (you do NOT need to disconnect the large fitting in the high pressure line itself).
Support the pump as best as possible and remove the front and rear pump-to-bracket bolts. There are three bolts in the front (14 mm socket if you’ve removed the sprocket under the PS pulley; otherwise you may need to use a 14mm combination wrench because of clearance).
There are two nuts on the rear of the PS pump to remove from under the truck (12mm socket, gear wrench, or combination wrench), and one 14 mm head bolt above those you may choose to loosen or remove. Remove the pump from underneath, turning it to clear; it will come out from below with some manipulations.
My rebuilt PS pump did not come with a reservoir (it did back in 2007 on first R&R) and it did not have a sprocket or pulley either. This condition is typical these days. Unfortunately, the little plastic envelope did not contain enough/correct O-rings, so had to pick up some from the parts store.
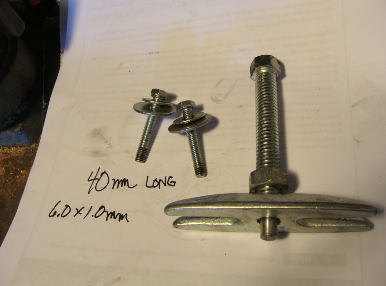
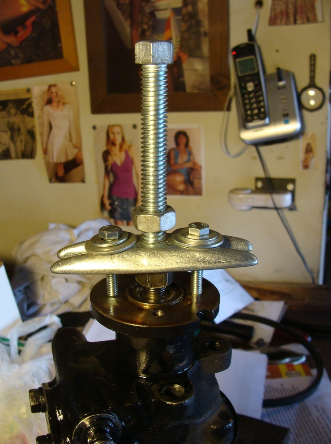
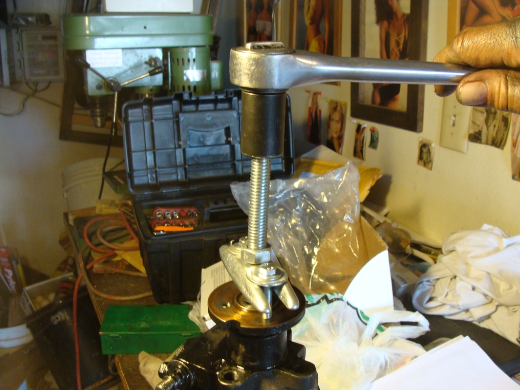
If the sprocket wasn’t removed earlier like my situation, I used a steering wheel puller fitted with two 40mm x 6.0mm x 1.0mm bolts to remove the sprocket.
The reservoir was straightforward to remove by removing the two securing nuts (14mm wrench or deep socket) . I transferred the two studs over to the new PS pump, and replaced the two small O-rings on the studs at the rear housing of the reservoir.
I cleaned out the reservoir housing including the little screen inside it.
I oiled the seal on the new pump that goes into the reservoir and installed that onto the pump.
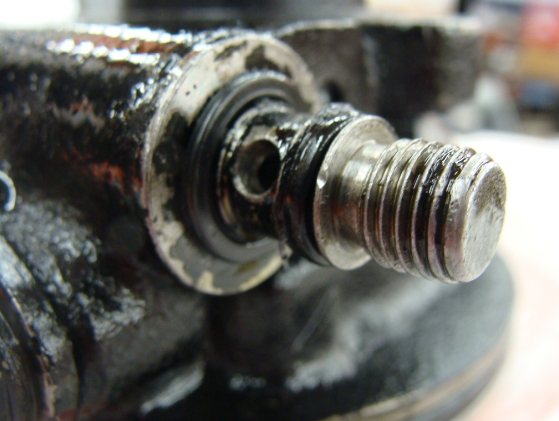
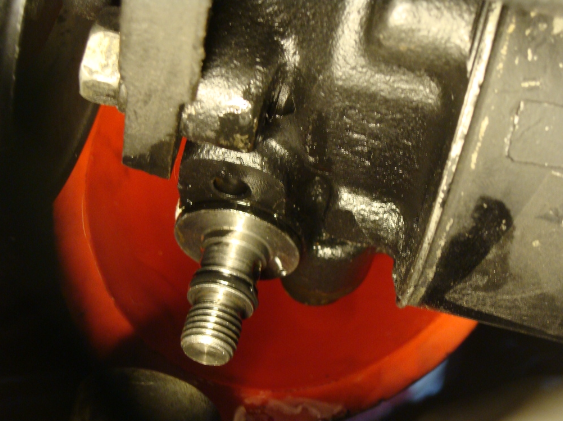
The shaft on the new PS pump where the banjo fitting would go did not have the inner seal, just the smaller outer seal as shown here on the old PS pump, so add that seal once the pump is bolted in.
The old pump.
This is the new pump, but needs that inner seal added.
I had to file the supplied woodruff key a little narrower before I could tap into the slot on the new PS shaft.
I tapped on the sprocket (but not the pulley) before I maneuvered the pump back up into position from underneath. Place the pump in position and install the mounting bolts and nuts somewhat loosely.
Connect the return line, and install the larger seal then the banjo fitting, and tighten all the mounting bolts and nuts securely. Line up the drive pulley with the woodruff key on the shaft and wiggle it on, or just bolt the pulley onto the sprocket with the four small bolts if you installed the sprocket before bolting in the new pump, and tighten the large PS pulley nut semi-tight.
Fill the PS system with fluid and turn the pulley by hand clockwise several times, and turn the wheels back and forth all the way several times as well, to help distribute the fluid.
Install the PS belt, tighten the idler adjustment bolt to get the belt real tight, then tighten the power steering pulley nut (17 mm), again using the 21 mm socket on the crankshaft pulley bolt to hold the engine from turning. Then loosen the idler adjustment bolt to get the right belt tension and tighten the idler collar nut with the 22mm wrench.
Add more fluid as necessary; bleed the system by turning the wheels all the way from one side to the other several times, then checking the fluid level. Replace the bottom engine-guard plate (four 12 mm head bolts). Check fluid level and check for leaks.
Observe the following torques:
Pump pulley: 43 ft. lbs. (58 Nm)
Pressure line connection: 35 ft. lbs. (48 Nm)
Pressure line bracket: 17 ft. lbs. (23 Nm)
Pump-to-bracket: 34 ft. lbs. (46 Nm)
Take truck off jack stands, and reconnect the battery negative cable.
Power Steering Idler/Tensioner Pulley Bearing Replacement
Wear eye protection.
Loosen the idler pulley collar bolt (22mm wrench) again and loosen the power steering adjustment bolt.
Use a 12 mm socket and long extension to remove the PS belt.
Remove the idler pulley collar bolt and remove the idler pulley.
Make note of how any spacers and stuff is oriented.
The bearing is Mazda #996068302 or National Bearing #302-CC (O’Reilly).
It is 42mm o.d., 15mm i.d., and 13mm thick.
Make note how all the pieces fit in, or take photos.
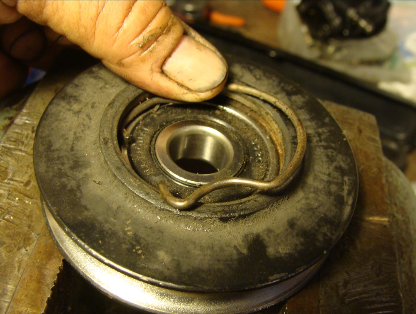
Rest the idler pulley face down on a bench vise opened so there’s room for the bearing to move down.
Use a small screwdriver and cup your hand over the bearing as you remove the retaining spring.
Use a socket (I used 9/16 impact socket) and hammer to tap the old bearing out. I then turned the pulley over on the bench vise and used a 30mm socket to tap the new bearing into place.
Then I installed the retaining spring.
All done with the bearing replacement.
Now re-install the pulley and belt.
Leave a Reply