Parts you will need:
Moog K9948 is an aftermarket part number for the front leaf spring bushing (Mazda 387428330)
Mazda UB4028333 is for leaf spring in the rear.
Mazda UB3928333 is for the upper shackle in the rear.
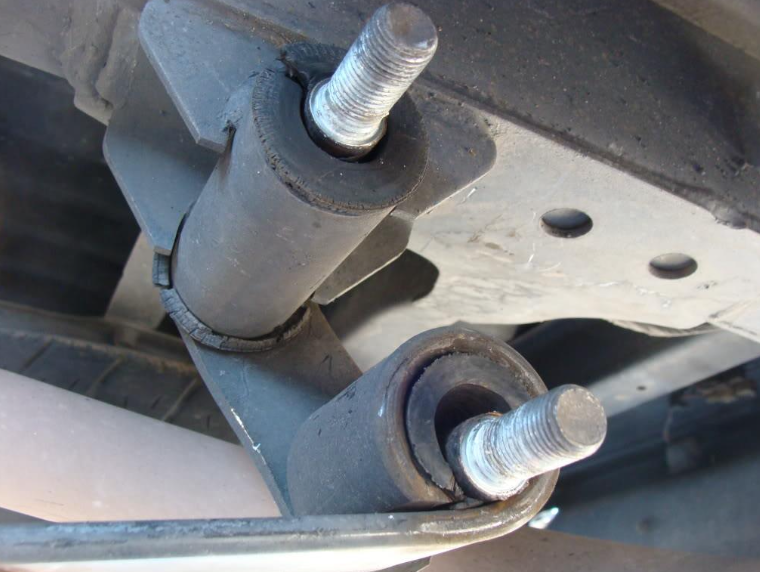
I had never done leaf spring bushings before, but this was my situation, and I could feel the truck bed shifting on some turns:
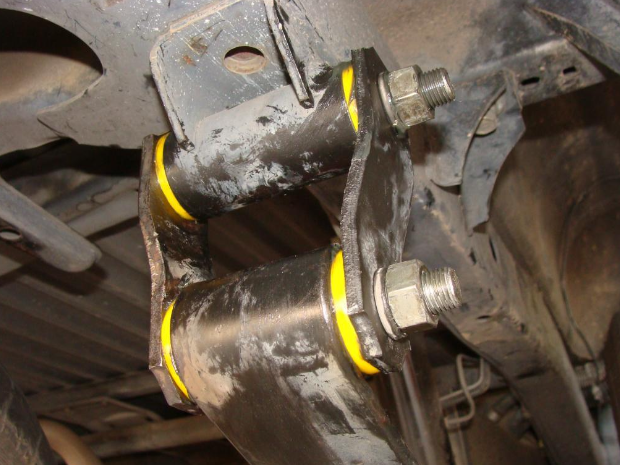
I used yellow Roky brand leaf spring bushings on mine (believe Roky is no longer available), which used the same part numbers as genuine Mazda parts. Beware of sites that incorrectly claim Ford Ranger leaf spring bushings will fit the 1986-1993 Mazda trucks made in Japan.
Because of the tailpipe, I decided to start on passenger side.
I wore safety glasses while working underneath the truck. I loosened/tightened everything by hand because of lack of clearance for my electric impact wrench.
I loosened the nuts on the rear shackles (21mm socket).
I disconnected the shock absorber at the bottom and removed the nuts on the U-bolts.
I hammered the rear shackle out, and cleaned it up using wire wheel on my 3/8 inch drill held in my vise, wore safety goggles.
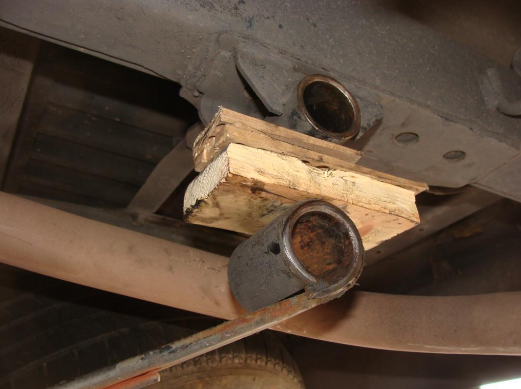
I used wood blocks to maintain spacing.
I was able to readily remove ALL the rear bushings by hand, that saved a lot of time. I cleaned up the “cylinders” where the bushings sit using steel wool. I greased two of the bushings and the shackle surfaces and the internal surface of the “cylinders” and put the bushings onto the shackle.
I re-installed the shackle with bushings, and greased the matching bushings, and put those into place. I used 6 inch clamp and/or washer/nut to pull the bushings into the cylinders, using a socket for the threaded end of the shackle to move into place.
I lowered the front leaf spring/bushing, was secured by the dreaded 23mm nut. My only 23mm socket is a deep impact one, and there wasn’t enough clearance to use that, the fuel tank was in the way. So I used a (don’t hurt me) 12 inch adjustable wrench.
Anyway, the front bushings looked pretty good, and I wasn’t able to remove those as easily as the rears, so I decided to leave those as OK.
I bent the two U-bolts a little tighter in the bench vise, so I could feed them into the lower bracket.
This took almost 2 hours. Then on to the driver side. I decided to be smarter here, and not even look at the front bushing. I loosened the rear nuts. I used a piece of wood and hammered in some wood shims to “fix” the spacing of the rear leaf spring cylinder and the shackle cylinder, I removed the rear nuts, and hammered out the shackle, using a pry bar to move the tailpipe towards the truck centerline, so I didn’t have to disconnect that.
Again, the bushings came out by hand. So I cleaned up the driver shackle and cylinders as before, lubed up and installed the bushings. Since I had the spacing “fixed”, the shackle and bushings were much easier to install on this side. I didn’t touch the U-bolts or the shock absorber on this side. The driver side took 30 minutes.
Leave a Reply