Written By Cusser – Slight edits by MazdaMitch
So your fan switch knob only makes the fan motor turn on at settings 3 or 4 huh? Or maybe the fan motor doesn’t come on at all. Lets dive in.
Confirm that the blower motor itself is OK. I have a 1988 B2200 factory manual and it details how to check the blower motor; bad news, it doesn’t state how to replace it.
I had also copied a few pages for B2200s out of an older Chilton AC manual but that got the replacement instructions wrong, or at least more difficult than necessary.
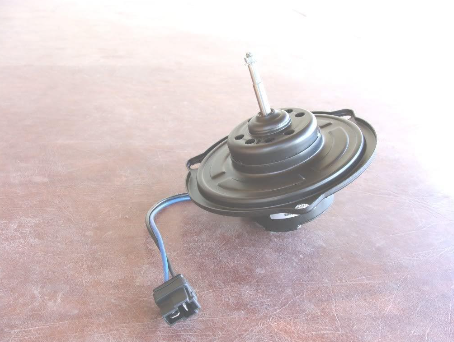
The blower motor is under the dash on the passenger side. I replaced my own so I’ve done this before. My motor brushes were worn out, and I was not aware where to get replacements.
First, checking the blower motor:
(1) remove passenger side plastic kick panel.
(2) undo the wire connector
(3) turn the ignition switch to ON and heat/AC and check for voltage at wires with a test light or voltmeter. If the wire doesn’t have positive voltage, you have a different issue.
The blue wire on the blower motor is positive and the other is negative, so test the blower motor itself to the battery by hot-wiring those two wires to battery positive and negative. Use can even us an 18v cordless batter to test this. If the motor is good, it will spin, fast!
The blower motor should also work in highest fan speed, as there is no resistor in the blower resistor module for that, it’s straight through.
So if it doesn’t you can almost bet its the blower motor resistor wires broken.
Second, replacement:
(1) remove passenger side plastic kick panel.
(2) undo the wire connector
(3) remove the three screws, either 8mm socket (1/4 drive better) or Phillips head.
(4) ease out blower motor assembly
(5) transfer fan blade to new blower motor
(6) install in reverse order.
You do not need to remove the ECU computer from the truck panel as my one source said. My replacement came from Autozone, #PM3715.
OK, here was my real life scenario. My blower resistor finally went out, had blower speeds on 3rd and highest speeds, but no AC compressor operation. On speeds 1 and 2, AC compressor kicked on but no blower motor.
So I fixed that today.
First, I cleaned out the glove box.
Then remove the glove box.
Remember which way the latch points before you unscrew the two screws holding it. Keep the door retainers on their correct sides when you unscrew those.
View after removing glove box, note the relays and switches for the AC.
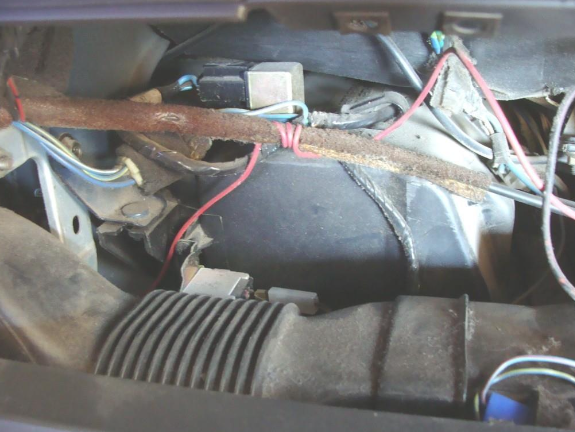
The blower resistor is more to the outside and more difficult to see, its coils are hidden inside the air box assembly. See this from the manual. The screws do face straight down, as shown. There are two wire harness connectors to it.
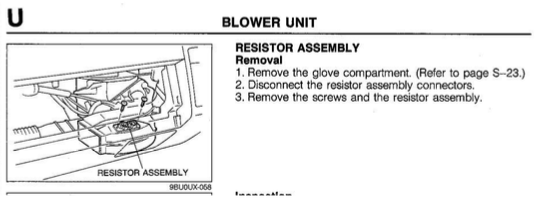
It is removed by unscrewing two Phillips head screws, then removing the two harnesses. Well, I said two harnesses, but mine had one harness, one block-off, and a thicker blue wire. Visually inspect the resistance coils.
A break is bad.
The side of the blower resistor with the terminals has markings C, L, M, H2 AND H1. Here’s about what the blower resistor should test, with an ohmmeter, all in ohms, all measured from the C terminal to the ones listed:
L about 2.0
M about 0.9
H2 about 0.3
H1 continuity (0 to 0.1)
Note the broken middle coil on mine.
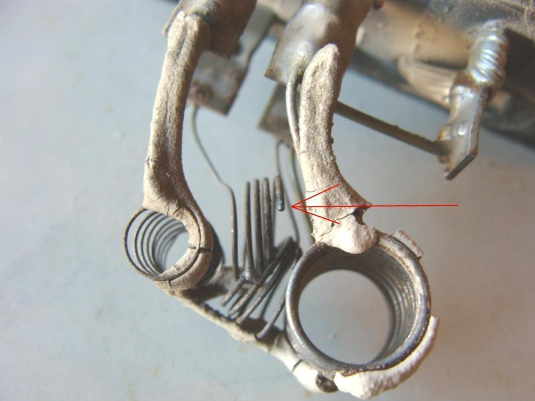
Note that mine contained a “harness to nowhere”, some are like that.
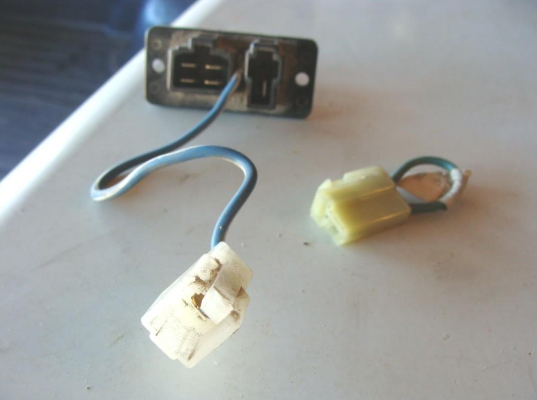
Of course, all four of my parts yard spares were different than mine, and didn’t have that wire. Honestly its not a good idea to skimp and go “used” here. By new from Rock Auto.

Using Electronics 101, I saw that wire also went to the terminal on the blower resistor, so I cut the wire off my broken one, and crimped on a female push-on connector and attached that to the terminal in place of that harness to nowhere.
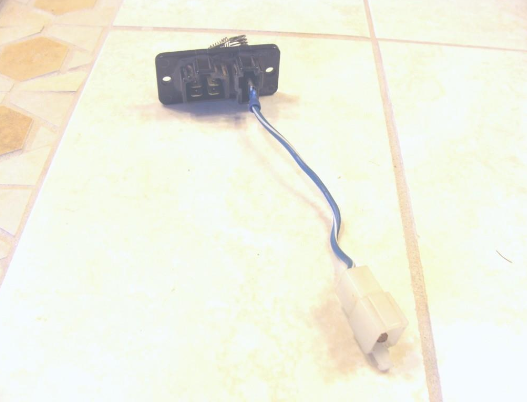
Then I buttoned it all up, and it works.
Watch this YouTube Video for more

Leave a Reply