Written By Cusser – Slight edits by MazdaMitch
My 1988 B2200 developed a bad AC clutch bearing. A shop would typically just replace the entire compressor, as shops would likely just pull the compressor if they had to replace an AC clutch, so its easier for them just to install and warranty an entire compressor and these compressors are also getting hard to find new.
Anyway, I’m not “most shops”. When I pulled the AC belt and spun the AC pulley, I could hear and feel that the bearing was bad. I had a used/bad compressor which had a fine AC clutch bearing though, so figured to swap the AC clutch parts except for the electrical coil. I did all this with the compressor in place, did not need to unbolt it from its mount or release its refrigerant. Note that I did NOT have to remove the fan shroud or move it to the side.
Typically, I just engage the compressor with the engine off, and the AC belt on, to loosen the center nut with the 19mm socket, but I wanted to show what one might do if the AC clutch would not engage due to bad coil, oily clutch, etc. So I removed the AC belt using 14mm gear wrench and a 12mm socket on an extension.
I got the loaner tool from AutoZone to hold the pulley immobile while one loosens the nut, but my 19mm socket was too big to fit in the hole.
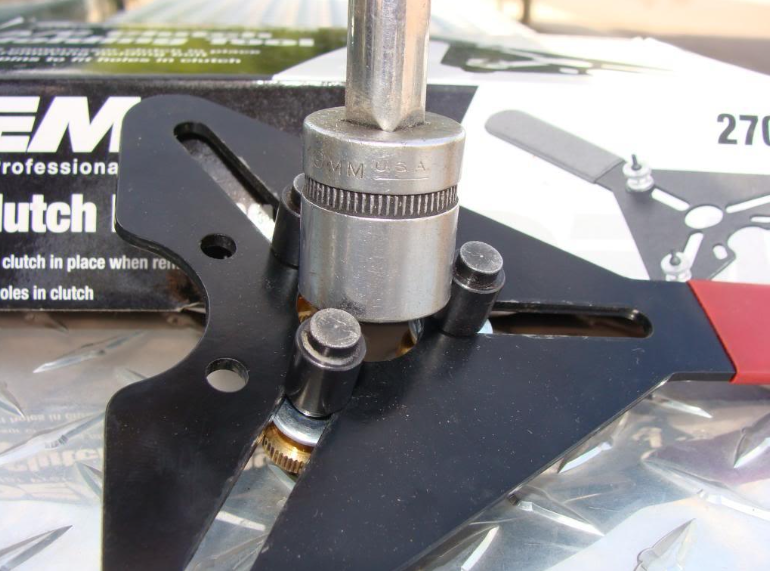
And if I put the socket on the “other side”, then the pegs were too short. I tried using longer hex head screws 1⁄4 inch x 20 with the loaner tool but the nut was on too tight.
So I just used a Vise-grips LC1218 pliers to hold the compressor hub steady while I did loosened the center nut.
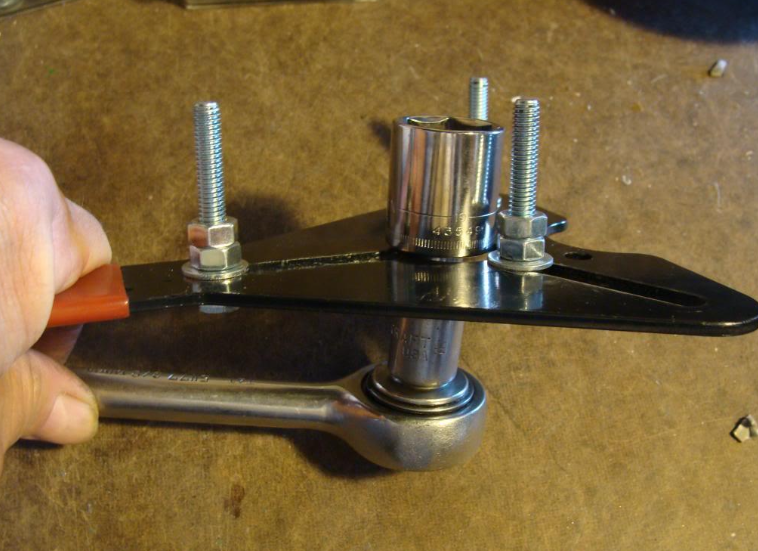
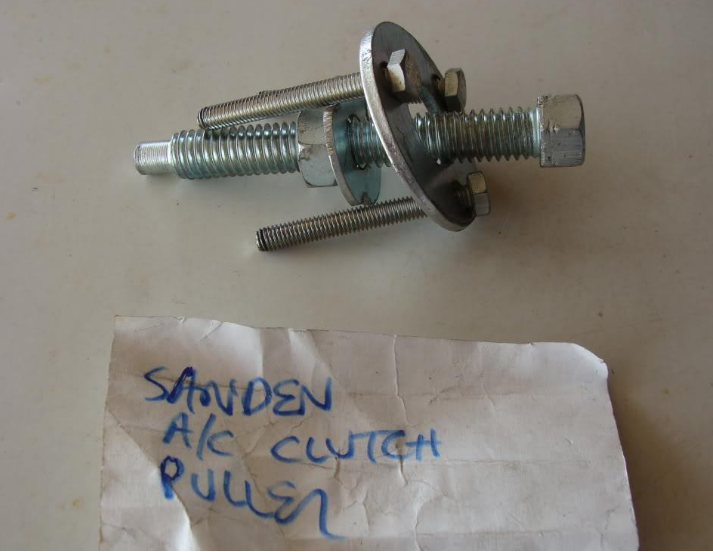
OK, to pull the hub, a loaner tool didn’t work, so I made my own from these parts:
- Three bolts – 2 inches long, thread size 1⁄4 inch x 20 (yes, the holes in the hub are threaded SAE, not metric).
- One bolt – 2.5 inches long, thread size 1⁄2 inch x 13, with matching nut.
- One washer – 2.0 inch diameter; this will need three holes to be drilled so the three bolts can pass through.
- One washer with 1⁄2 inch hole, 1.25 inches diameter (so the big nut doesn’t come through the hole in the large washer). This will need to be slightly ground in three places. If a 2 inch washer has a 1⁄2 inch hole already, forget this item.
I threaded in the three 1⁄4 inch bolts into the hub and used the big Vise-grips to hold the nut stationary as I turned the bolt to extract the hub. Some of you who weld might just weld that nut and washer to the bottom of the large washer. I epoxied mine together today after using it.
After removing the hub, you’ll need circlip pliers to remove a circlip, its a little tricky, and I used a mirror here to help out. The woodruff key for the hub should remain in place. If it comes out, don’t lose it !!!
Then I tapped off the AC clutch using a piece of wood.
If you want to simply replace the bearing, remove the circlip and tap out the bearing using a big socket (I used a 36mm socket to tap this bearing out.
Simply push the better or new AC clutch on. Then I replaced the big circlip, to hold the clutch in place. Then I added the hub, lining up its slot with the shaft’s woodruff key.
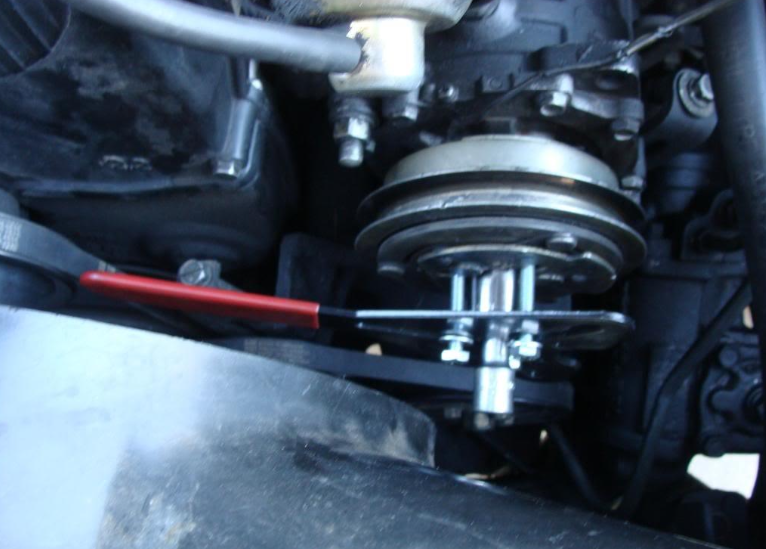
Tighten the center nut while holding the hub immobile like was done before loosening the nut. Replace AC belt, tighten properly.
NOTES
My own Sanden 708 AC model 7225 clutch bearing is Bore/i.d. = 35mm, outer diameter = 55mm, and 20mm deep, I measured it myself Check: yours could theoretically be different) Autozone lists it part #M2021 for $22 or from http://www.ackits.com/ for $17
These prices where from several years ago.
Leave a Reply