Disclaimer: In most states it is illegal to tamper with your odometer.
Odometer fraud, also referred to as “busting miles” (United States) or “clocking” (UK and Ireland), is the illegal practice of rolling back odometers to make it appear that vehicles have lower mileage than they actually do. However it is legal on vehicles that are custom built, are older than 10 years, or have no intentions of ever selling the vehicle, and/or if you do sell, you may or may not have to disclaim on the title that the miles are not accurate.
I’ve seen people asking how to reset the mileage to 0; I did it and
haven’t had any problems. It can be a lot of tedious work but it’s
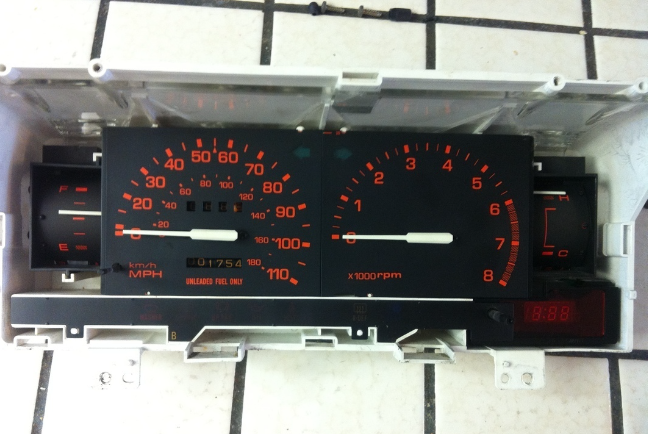
rewarding. I am resetting the mileage on a cluster with the tachometer
included, I think the cluster without the tachometer is probably similar
with some differences, but hopefully is the same principle.
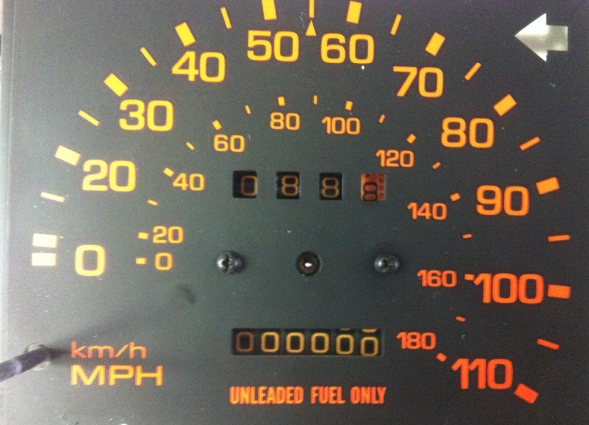
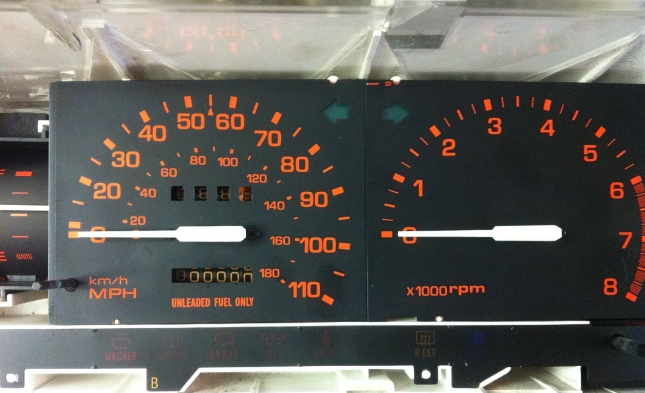
You can put the mileage to whatever you wish…but that is a real challenge
but can be done. Setting it to 000,000 may be the easiest.
Take the top 2 screws out of the front, and then along the sides are clips
holding the plastic cover on. Un-clip it and pull it off.
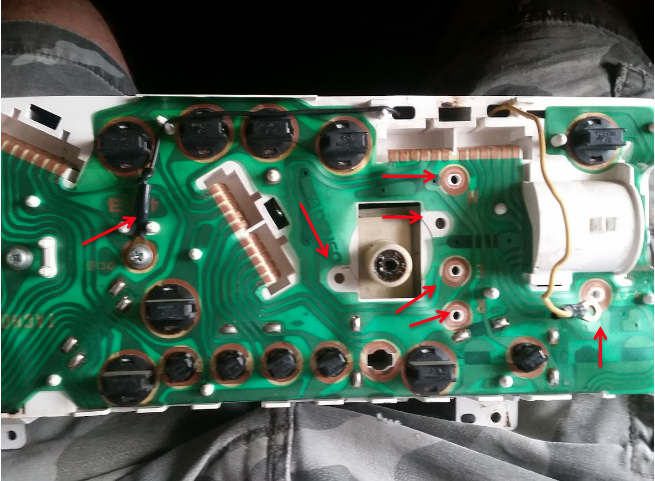
There are 4 (sometimes 5) screws around where the speedometer plug
in, take them out (Circled in red).
There may also be a black and yellow wire, screwed into the circuit
board, you will have to take these off as well and feed them through the
instrument panel body.
Take the gauge out, then pull the needle off, this one is plastic, but the
cluster without the tachometer is a thin metal strip so if you’re doing it on
that one, be careful it bends real easy. Then remove the 2 screws and
the face comes off.
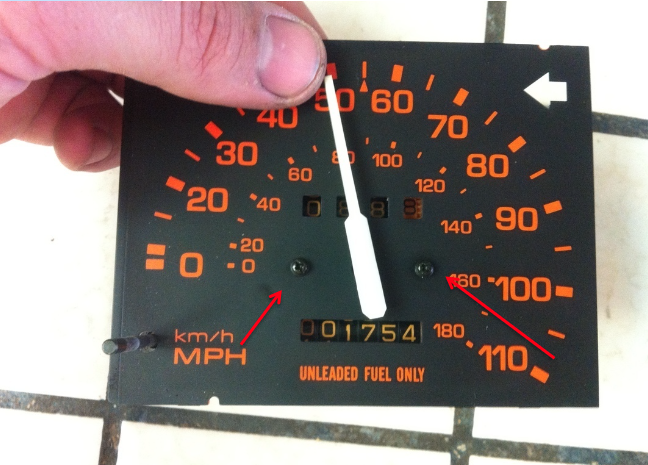
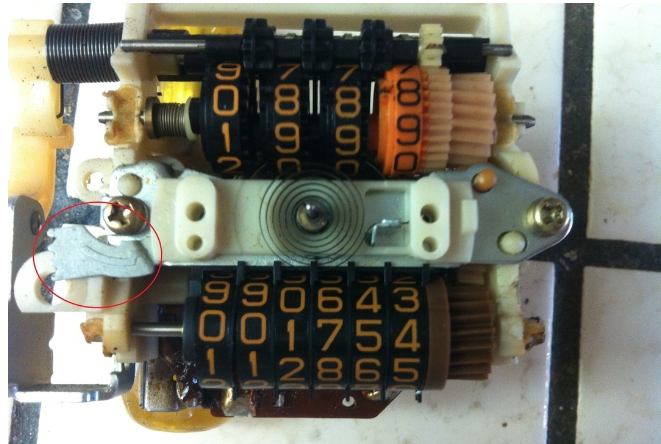
There is a gear or switch or something, not sure what it does, I see what
it moves (the coiled wire in the middle) but not sure what it does to the
speedometer, so make sure it’s in the same spot when putting it back in.
(Circled in red)
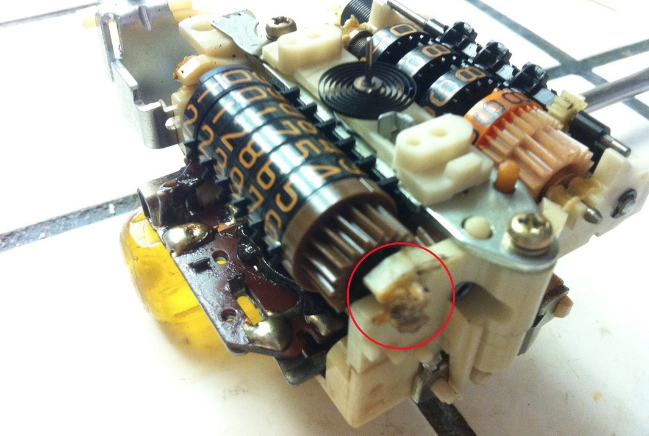
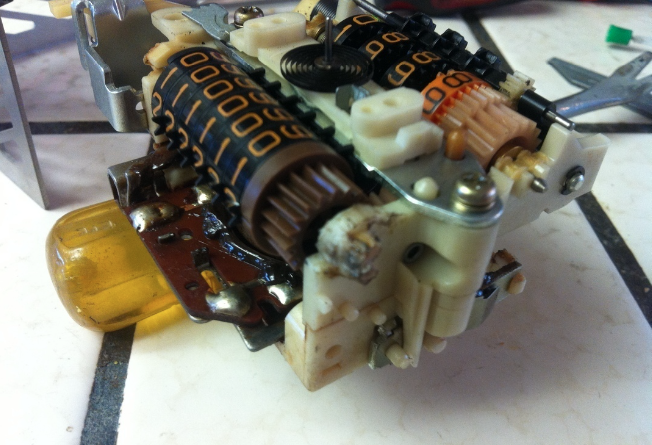
There are several kinds of odometers out there, some require you to melt plastic to get it out, some have those circlips that are tiny and love to go flying across the room. I will refer to the two types are orange numbers and white numbers. (orange numbers)
To remove the numbers, it is held on both sides with plastic clips, that are melted so it doesn’t come out, maybe a tamper proof sort of deal. I broke it the first time i reset to 0, but some superglue and a soldering gun and it melts back together. To take it apart, if you’re careful, I used a razor blade and heated it up using flames from stove (or a lighter) then opened it up so the rod will come out easier, you only need to do one side, the other you can slide it out of.

(white numbers)
This one has the circlips and shims, and you will have to remove a screw and remove the “cage” its in.
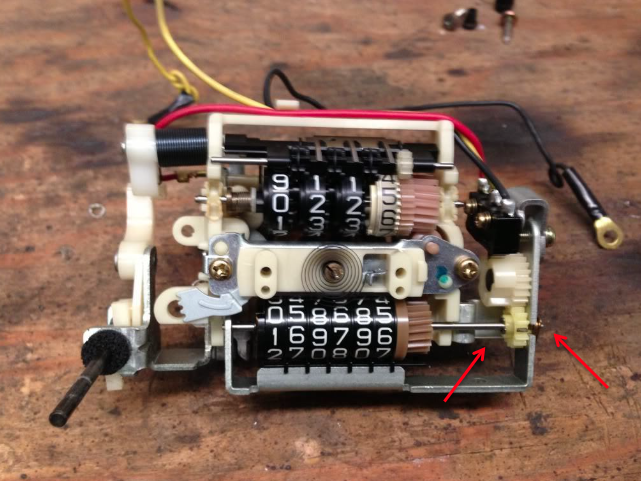
Red arrows are pointing to the tiny circlips to remove. There is also some hims made of copper. Pay special attention to all of this and take pictures along the way if you have to. There is one screw, once removed that will allow you to remove the gray metal holder along with the odometer. Then remove the circlips very carefully and the shims, slide the yellow gear back and the odometer will slide out of the cage.
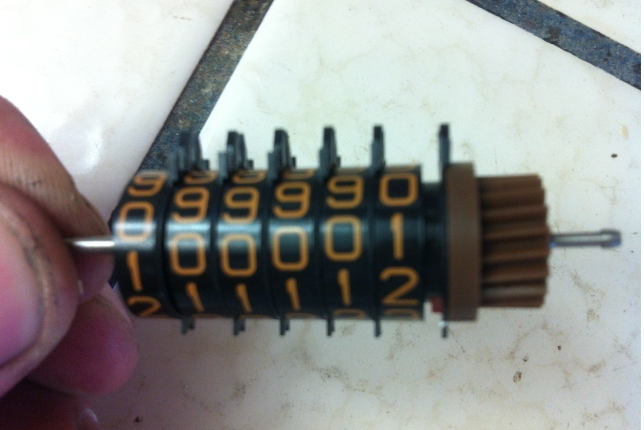
Now the odometer is out. This is where it becomes a challenge.
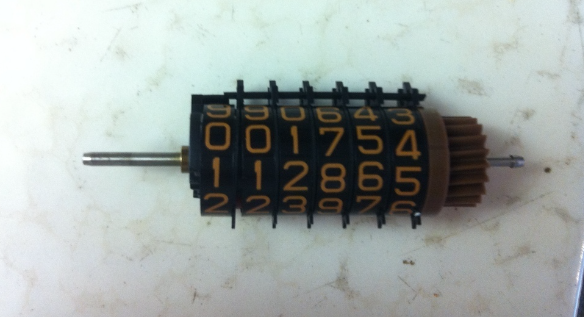
There is a plastic clip that holds it all together, it just pops off.

You’ll want to start at the far right, slide all the numbers to the left, and
then start moving the numbers and the spacers. 1st spacer on the far
right is pushed over, then roll the 1st number to 0, and then slide it next
to the spacer. Then move the next spacer, then the number to 0 and so
on.
Make sure the spacers are all pointing up(12 o’clock) and the numbers
are 90 degrees off, so I guess 3 or 9 o’clock depending on which side
you look at, in relation to the spacer tabs at the top. Another thing I
learned cause I thought it would’ve been nice, was to reset to 999,999
miles and let it roll over to 000,000, well it doesn’t do that, when it gets
to 999,999 it stops and will stay that way, so make sure to go to 000,000
I must have done this 7 times before I got it to line up and show through
the gauge plate just right. It was always showing half numbers in the
view window. Be patient, do not toss it in the trash, you will get it.
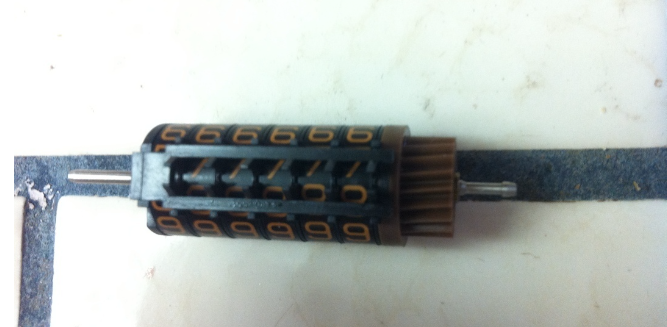
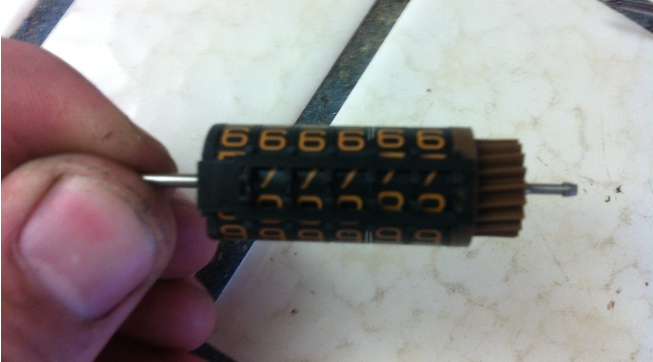
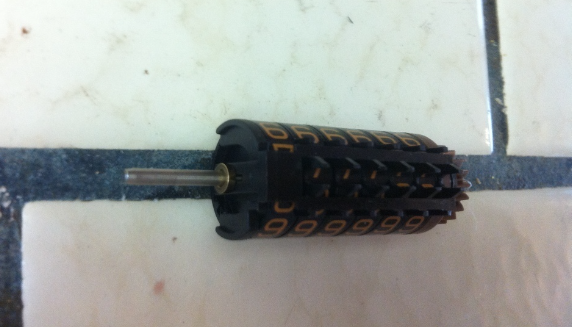
When you get them all to 0’s put the clip back on it, make sure the top
tabs are inside the clip. When its put together correctly, you should
have
777777
888888
Showing inside the clip, when looking through the top.
Now is when you need the soldering gun, install the numbers back in
and make sure the gears on the right are lined up, then melt the plastic
so it holds it in, again mine was broken, so I used super glue to hold it,
then I melted the glue and the plastic to hold it together(watch out for
the glue if you use it, when the heat gets to it, smoke comes up quick
and kind of burns your eyes. so wear something, or don’t have your face
above it when you use the soldering gun.
Put the faceplate back on and see how it looks before you assemble it
all back together. Just lay it up there you will see what I am talking about.
Reinstall back in cluster and put it back together. Go for a test drive, and
if you didn’t break anything and you see a mile or two work, go back home and have a beer. Job Complete and if you are like me, you will want something stiffer than a beer after this job.
Leave a Reply