Bolt in power window regulator and motor for 1986 through 1993 Mazda B2000, B2200 and, B2600i.
If you would like to skip reading and watch the YouTube Video, click here
You will need to buy the front power window regulator and motor from a 1994 through 1997 Honda Accord. I bought mine off craigslist for $60.00. You can also get them off eBay or your local parts store. You can even get them in really good working condition from pull a part junkyards.
They should look like this.
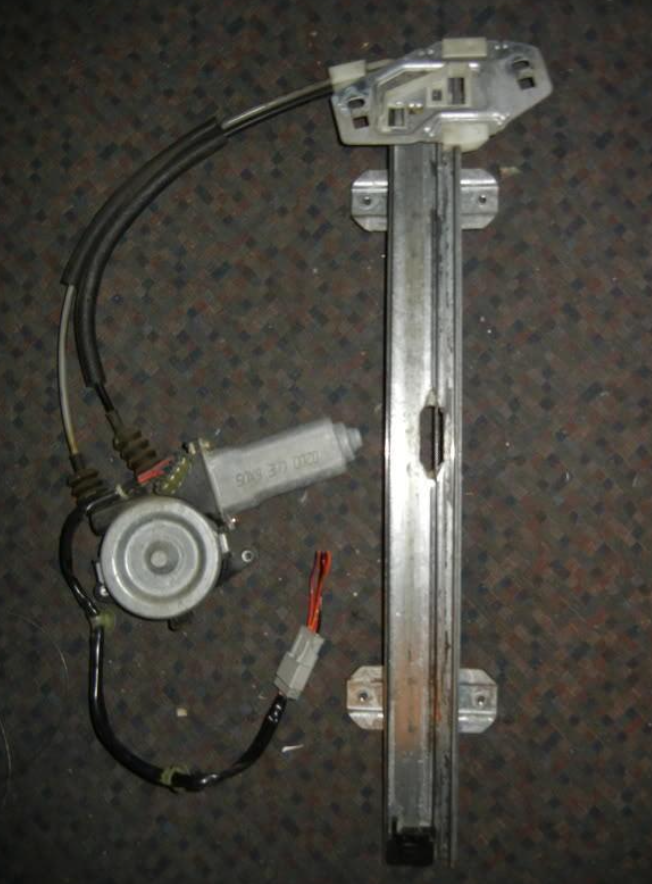
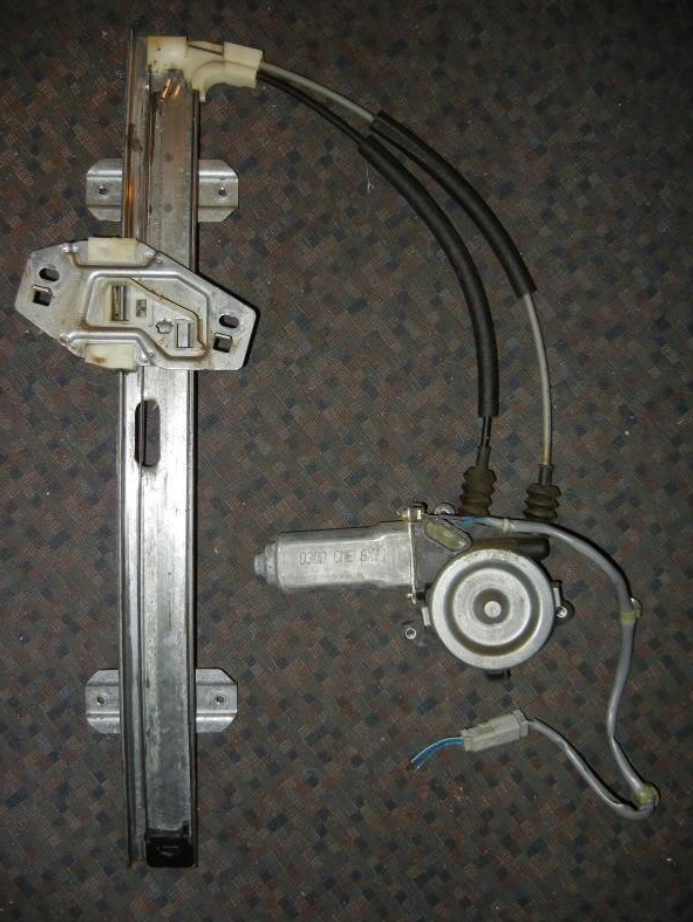
Next, you will need to remove your Mazda window regulator.
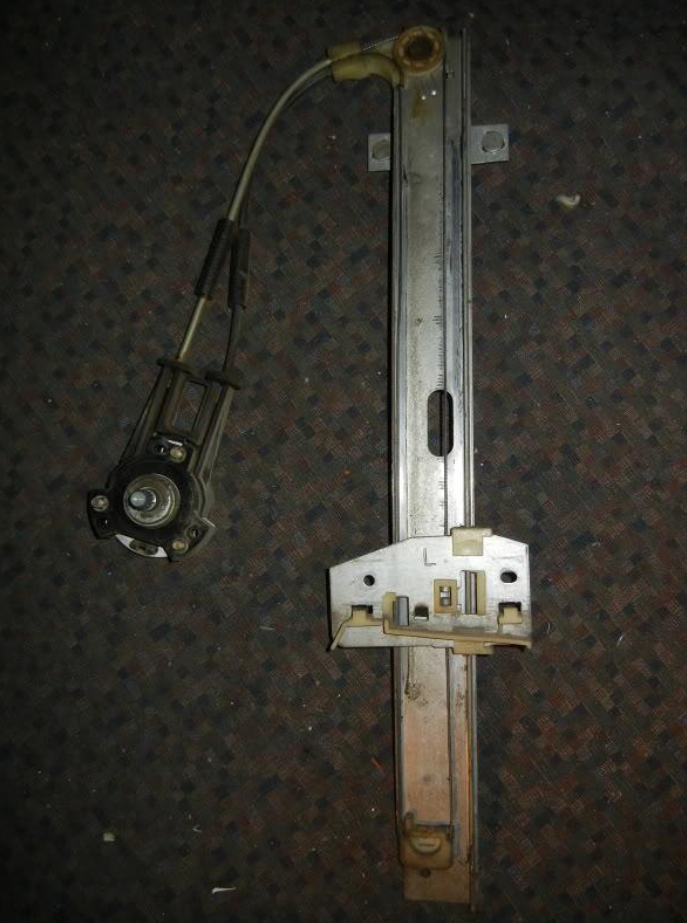
Now you can start disassembling the Mazda regulator.
- Start at the bottom by sliding the white cable guide over and remove cable from the guide.
- Remove both (grey and black) cables from the pulley at the top.
- Now you can slide the window mounting plate off the regulator track.
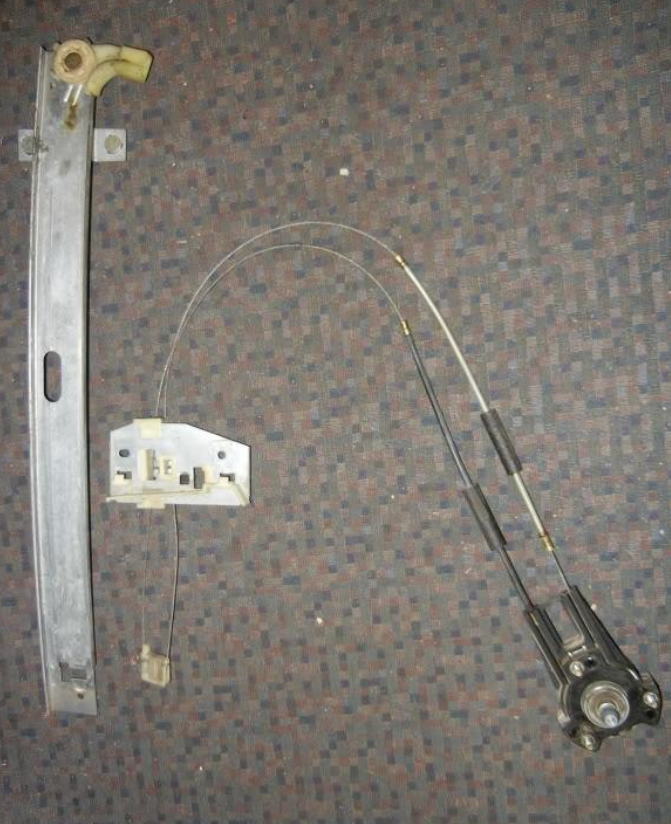
- Flip over the window mounting plate to remove the two cables.
- Discard the manual crank arm and cables.
Now start to disassemble the Honda regulator.
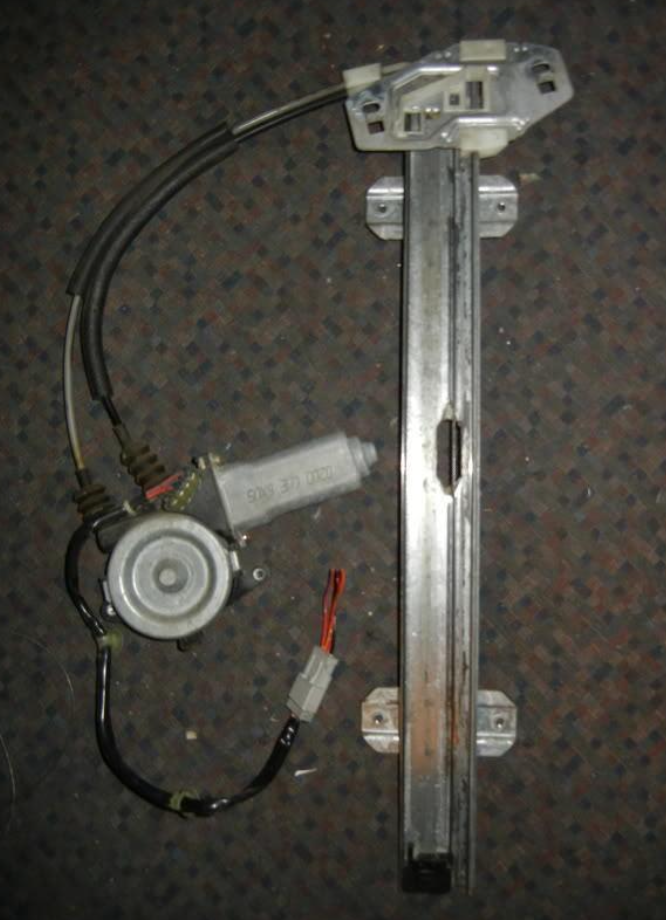
- Start at the bottom by sliding the black cable guide over to remove it for the regulator track.
- Then remove cable from the guide.
- To remove the upper (grey) cable you will need to cut the guide on the very top. (I used a dremel tool with a cutting wheel. In my picture you will see the cut i made on the right).
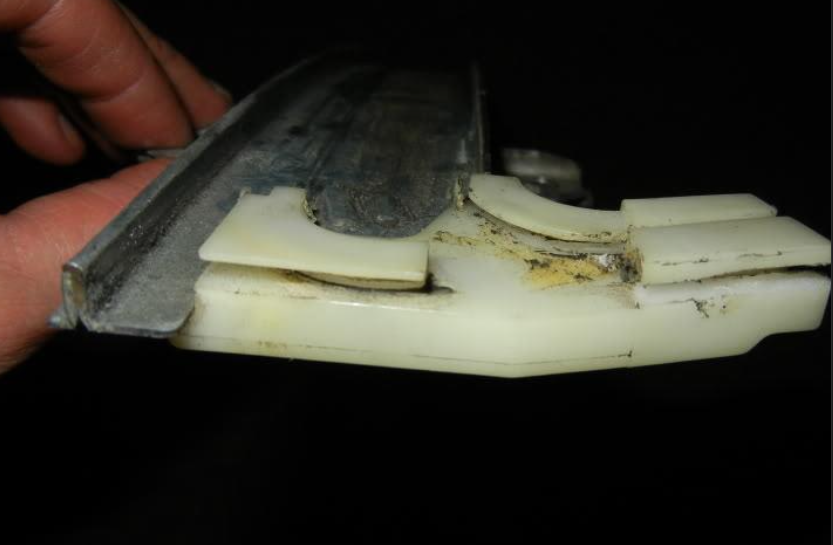
- Now remove the other (black) cable from the upper guide.
- You can slide the window mounting plate off the regulator track.
- Flip over the window mounting plate to remove the two cables.
- Discard the black bottom cable guide, regulator track and window mounting plate.
Now you will start assembling your Mazda power window regulator.
- You will now take the Mazda window mounting plate and attach the black cable to the bottom.
- Attach the grey cable to the top of the Mazda window mounting plate.
- Slide the Mazda window mounting plate on to the Mazda regulator track.
- Route the grey cable over the top of the pulley into the upper cable guide.
- Route the black cable through the bottom of the pulley in to the upper cable guide.
- Now take the bottom white cable guide and attach it to the cable.
- Pull the tension tight on the lower cable and attach the bottom white cable guide back into the slot on the regulator track.
At this point your done with one side. Follow these directions for the other for the other side.
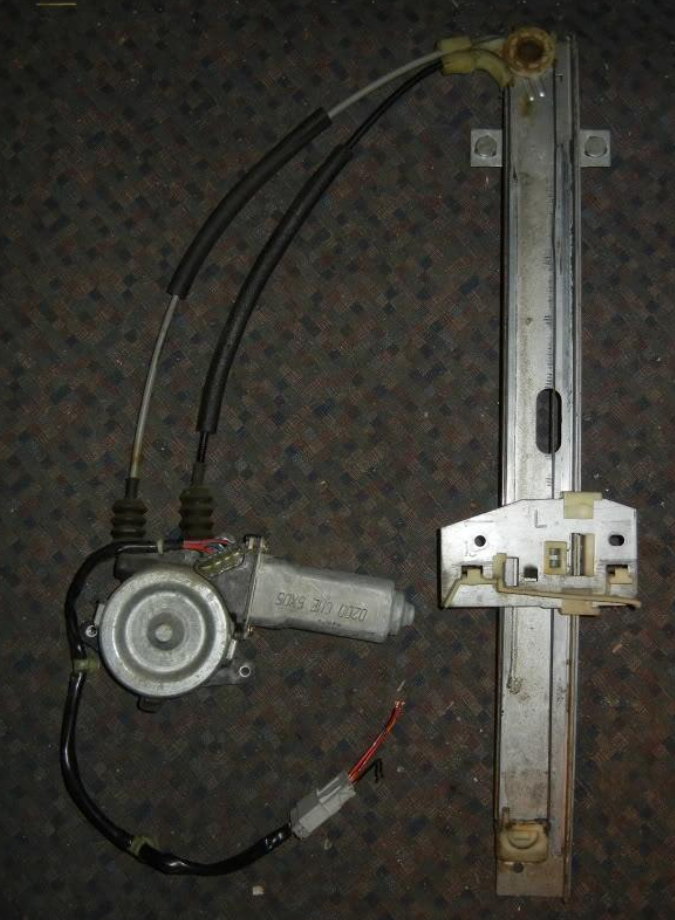
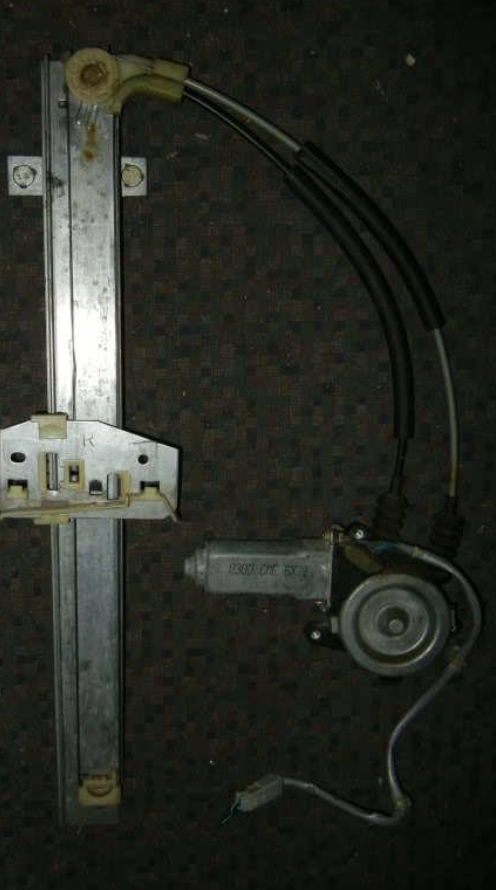
Mounting your power window regulator and motor.
- The window regulator track is going to use the factory holes.
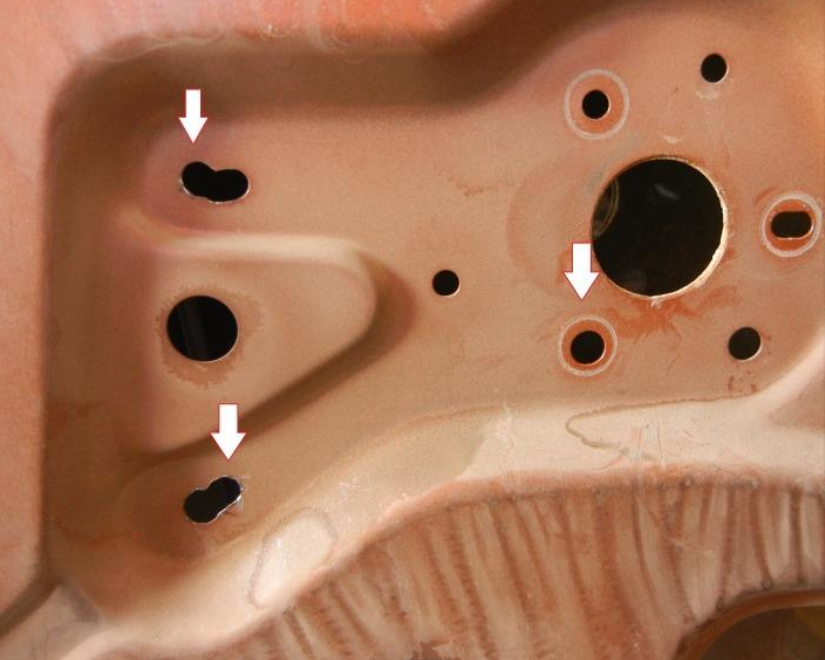
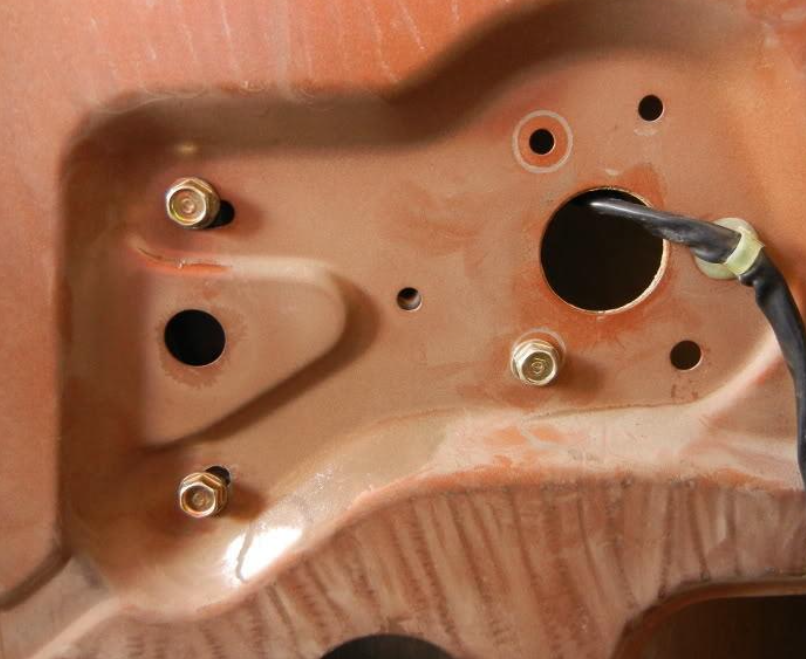
- To mount the window regulator motor i drilled two holes next to two already existing on the interior door structure using a 17/64 drill bit. (See arrow in picture)
- The third mounting point on the window regulator motor used the bottom hole where the window crank was. (See arrow in picture)
- Now its time to wire it up.
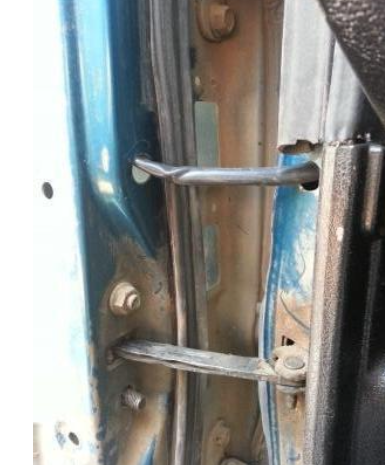
- Drill a 1/2 inch hole in the door jam, just above the door check. (See picture below) To get the hole to match up on the body. I closed the door and grabbed a sharpie marker, stuck my hand inside the door using the sharpie to mark my hole on the body where I just drilled. Go ahead and drill your second hole where your mark is. In the picture I used plastic tubing until I get my stainless steel door wire loom.
At this time figure out where you want your switches.
Now run your two wires from your switches to the doors.
Feed the two wires through the wire loom to the window motor. I recommend you add a male and female connectors near the power window motor, this will save you time during a power window motor replacement.
Go ahead and connect the wires to the power window motor.
Now wire up your switches.
Here is an example for you to use to wire up your toggle switches. (See picture below) For letters A,B,E,F are self explanatory.
Letter D you will ground to any nut or bolt in the cab of the truck.
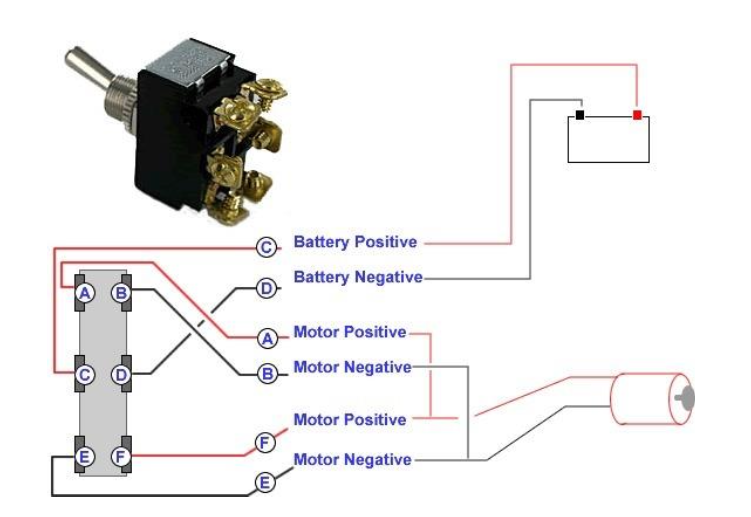
Letter C run to your fuse block under the dash.
I unscrewed the fuse block, pushed it back further underneath the dash.
Then turn the fuse block sideways to pull it out through the opening, now you can gain access to the back of the fuse block.
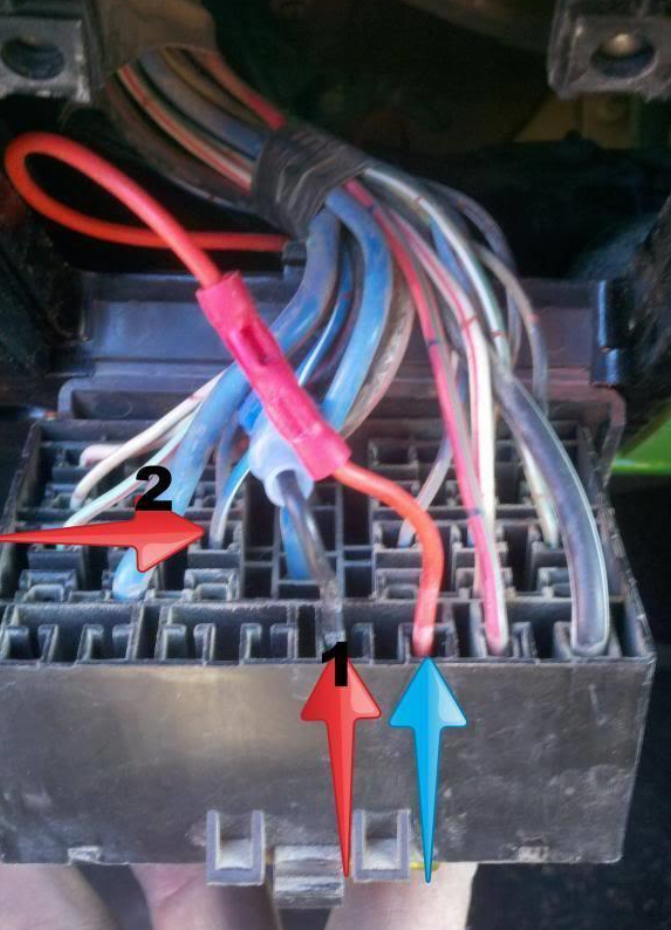
- Take letter C (red power wire) (blue arrow) and pushed it through an empty slot in the fuse block.
- Now crimped on a Non Insulated Female Quick Disconnect.
- Then take the black wire (#1 red arrow) and pushed it through the empty slot next to the red wire and crimped on another Non Insulated Female Quick Disconnect.
- On the opposite side of the black wire, crimped on a Insulated Male Quick Disconnect.
- Next crimp on a Quick Splice Connector to the Blue wire with a white stripe (#2 red arrow).
- Then plug in the black wire with the male end to the Quick Splice Connector.
- Flip over the fuse block and install a 20 amp fuse.
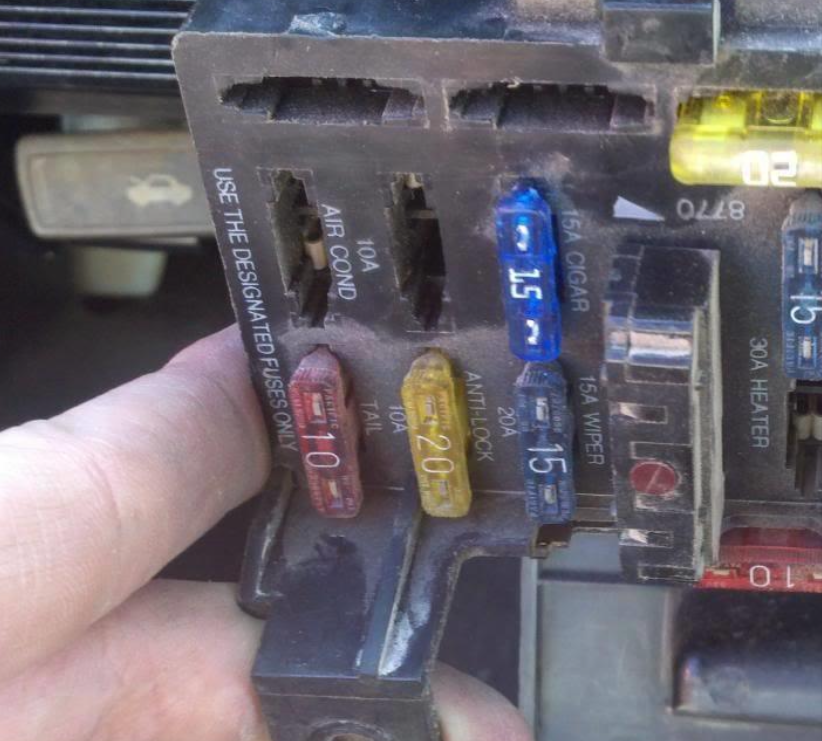
Turn your ignition key to the on position and test out your power windows.
If this wasn’t helpful enough, tap or click the image below to watch this video.

Leave a Reply