Written by: Cusser
Cusser (one of our forum members) had made a post in the forum about his wipers being slow. He rarely needs them in Arizona, but did notice that they should be faster than they were.
https://mazdaminitruckin.com/forums/d/741-windshield-wipers-operate-but-slow
Cusser wrote the following as he took everything apart and documented his job. He basically cleaned everything up really well and re lubed the plastic bushings in the linkage.
As I suspected, the factory workshop manual was lacking for this. Page references here refer to the 1990 Factory Workshop Manual here: https://mazdaminitruckin.com/service-manual/
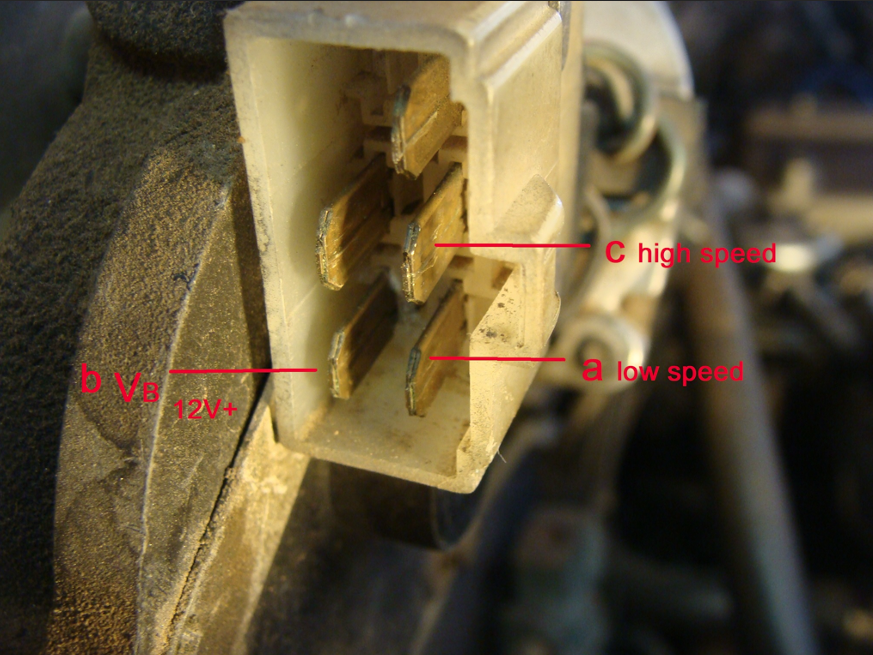
To test the wiper motor: reference page S-10.
Open the hood, unplug the harness at the wiper motor.
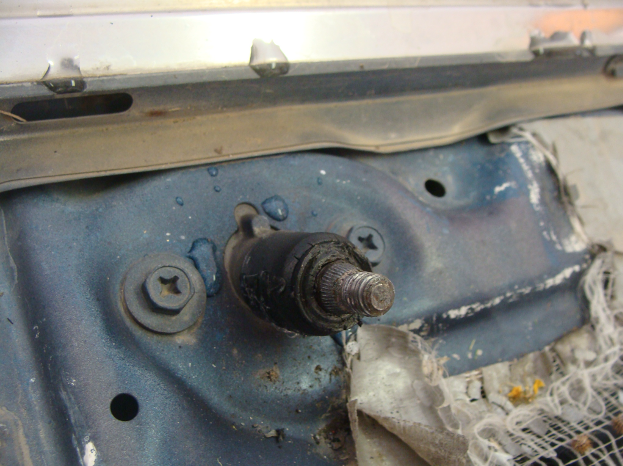
Connect 12 volts positive to terminal b as shown in the photo.
Use a jumper wire from battery negative or ground to terminal c, that should operate wipers at highest speed.
If you use a jumper wire to go from the negative to terminal a, that should operate the wipers at low speed.
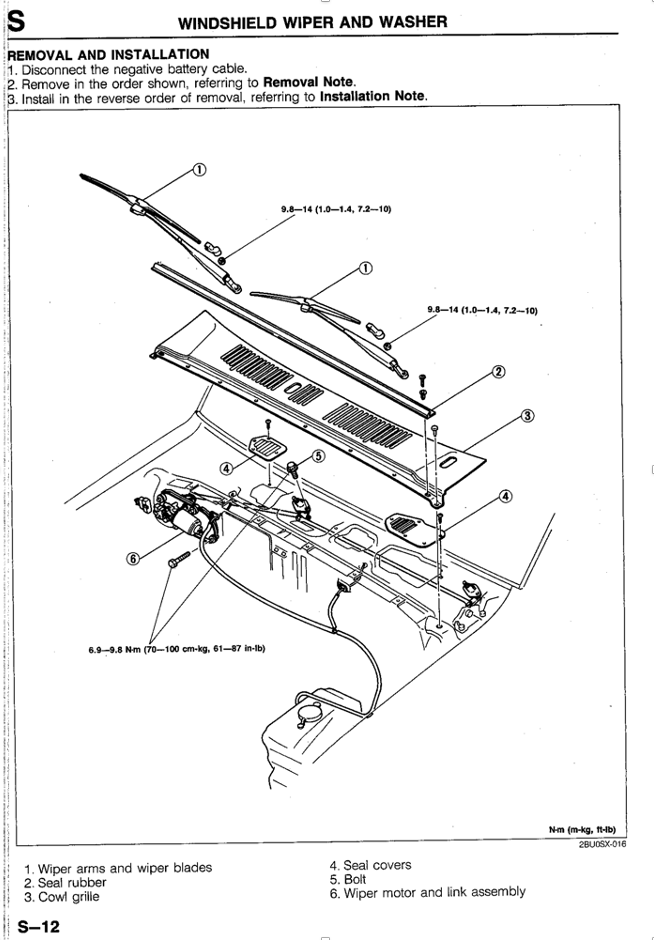
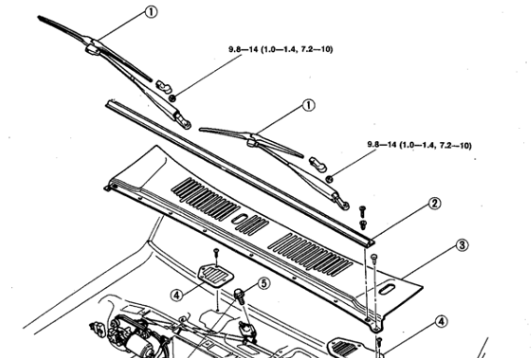
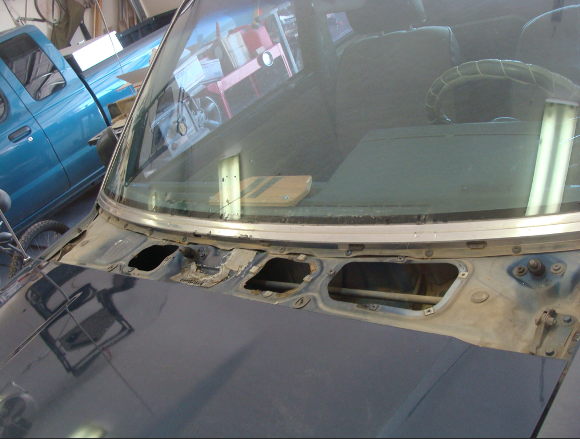
Pull back the plastic nut covers (if present) and remove the wiper arms nuts using a 12mm socket.
Remove the wiper arms by wiggling, using a small puller, or covering cowl with a towel and levering up on the wiper arm while tapping with a hammer.
The left wiper arm is different from the right one, so label with masking tape. Gently pull off the rubber boots under the wipers.
Open the hood and use a panel nut tool to remove the cowl rubber seal
Some of the plastic panel fasteners will likely break.
Use the panel nut remover tool to release the fastener at each end of the cowl.
Pull the cowl forward and ease out upwards in front of the windshield.
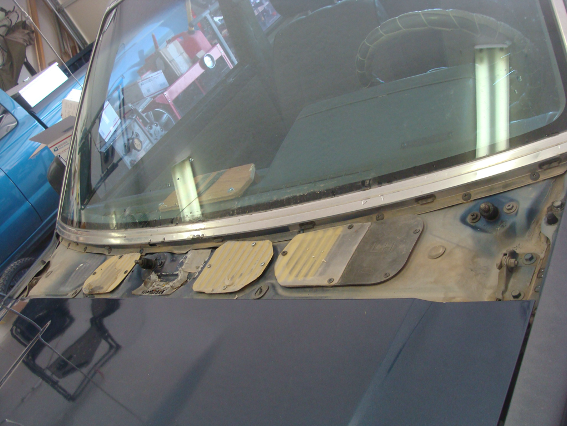
Remove the covers under the cowl with a screwdriver.
Use a 10mm socket and remove the two hex head screws on each side of the wiper shafts. If these don’t fall down by themselves, tap the shafts gently with a rubber hammer.

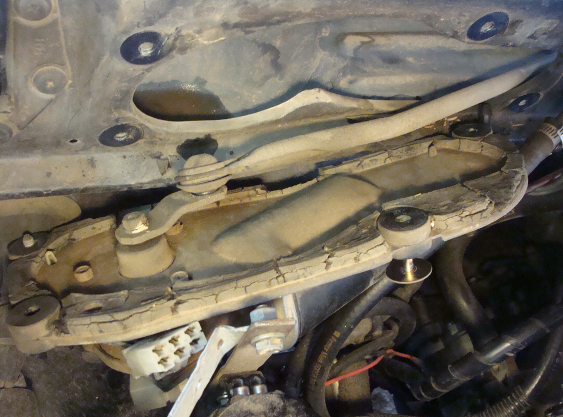
Disconnect the wire harness to the wiper motor on the right side of the engine firewall.
Use a 10mm socket to loosen the 4 hex head screws securing the wiper motor to the firewall.
Use a flat blade screwdriver and tap that with a hammer to release the wiper motor from the firewall.
Wiggle out the wiper motor with the linkage attached.
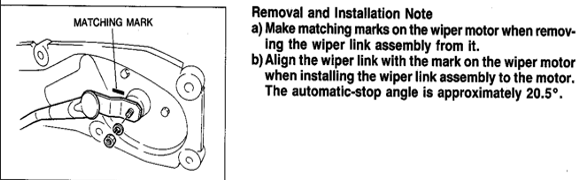
Mark the wiper motor shaft/stud and the bracket with a paint pen, so that upon reassembly the wipers will park correctly.
The workshop manual doesn’t exactly state to mark the motor shaft.
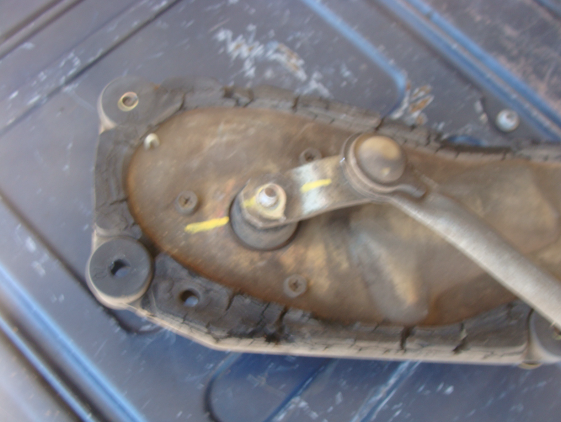
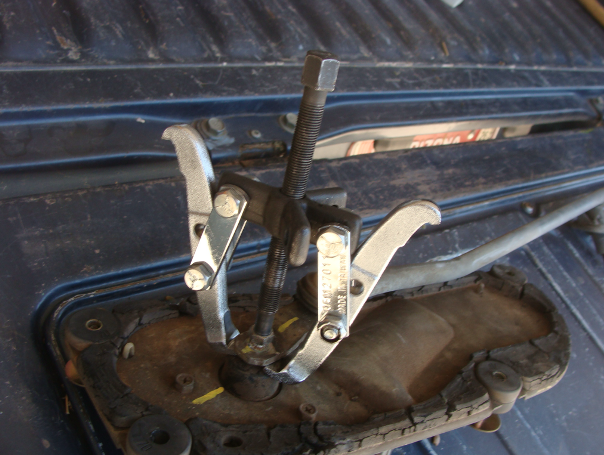
Use a 10mm socket to remove the nut and lockwasher holding the bracket/linkage to the wiper motor.
I had to use a small gear puller to pull the bracket off the wiper motor shaft.
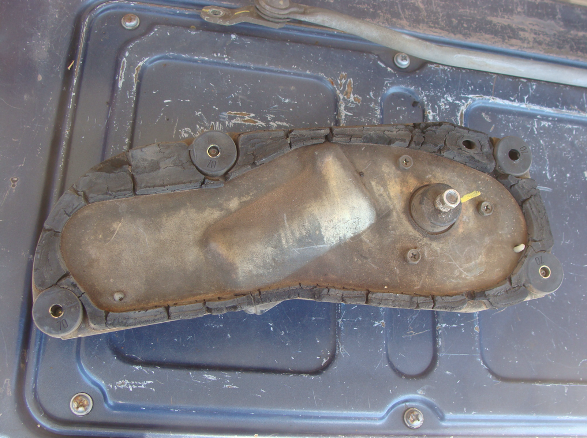
The wiper motor gasket was in pretty bad shape, and is no longer available.
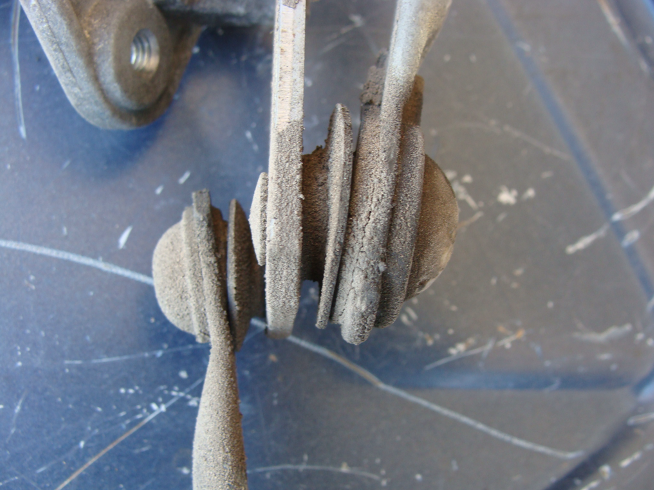
I used aerosol silicone lubricant on all moving parts of the linkage.
This is a “before lubing” photo.
If replacing the motor, make sure to line up the bracket with the correct orientation of the motor shaft.
Use the lock washer and nut to secure the bracket onto the wiper motor.
Wiggle the linkage assembly into place through the hole where the wiper motor mounts.
Pull the wiper mounts through their appropriate holes, noting that each has a raised bar that fits into the notch at the rear of their hole.
Loosely screw in two hex head screws on the sides of the wiper mounts.
Add the rubber boots to the wiper mounts.
Loosely screw in the four hex head screws securing the wiper motor to the firewall. Then tighten the four hex head screws on the sides of the wiper mounts and the four hex head screws securing the wiper motor.
Re-install the covers, cowl, and cowl seal.
Re-connect the harness to the wiper motor.
Install the wiper arms onto the wiper shafts; the wiper arms are splined, and must be oriented correctly.
Secure the wiper arms with the nuts and 12mm socket.
Note: if one is “simply” replacing the wiper motor, I believe that can be eased out without releasing the wiper arms and linkages. The orientation will still need to be marked so that the wiper arms/blades will be in the correct position.